
Using Air Fryer Accessories Without Airflow Problems
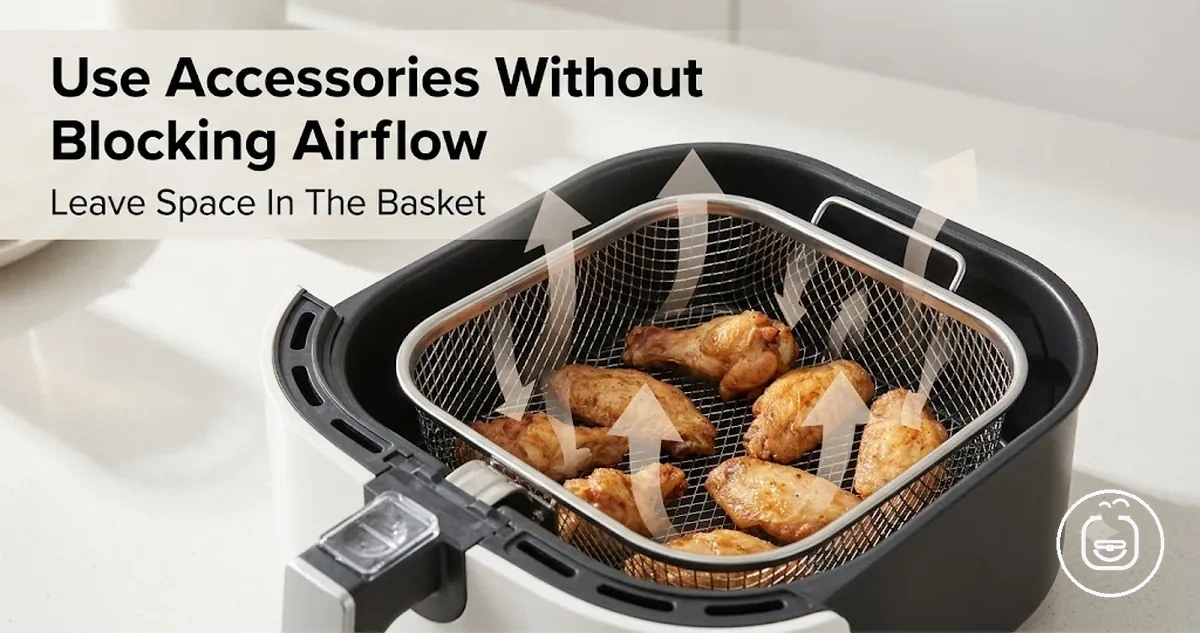
Air fryer accessories can support cooking when the liner, rack, tray insert, silicone mat, skewers, or tongs do not cover vents, lift during heating, crowd food, or interrupt the flow of hot air through the basket. Accessories help only when airflow, fit, and stable placement remain intact.
Air fryer accessories should be used with attention to accessory position, food contact, material condition, and safe handling. Cooking results can vary by basket style, oven-style layout, accessory shape, and food load, so an accessory that works well in one setup may require different placement or clearance in another.
This page focuses on judging how accessories affect cooking conditions before moving into placement, criteria, mistakes, and safety. The key checks are whether an accessory can contain or elevate food without crowding, leave vents open, remain stable during heating, and rest safely within the available space.
How Accessories Affect Airflow, Crisping and Cook Time
Accessory position and accessory surface can change how airflow reaches the food surface, which may influence crisping, browning, moisture retention, and cook time. The effect depends on how much of the basket base is covered, whether food is elevated, and how easily hot air can move around the food.
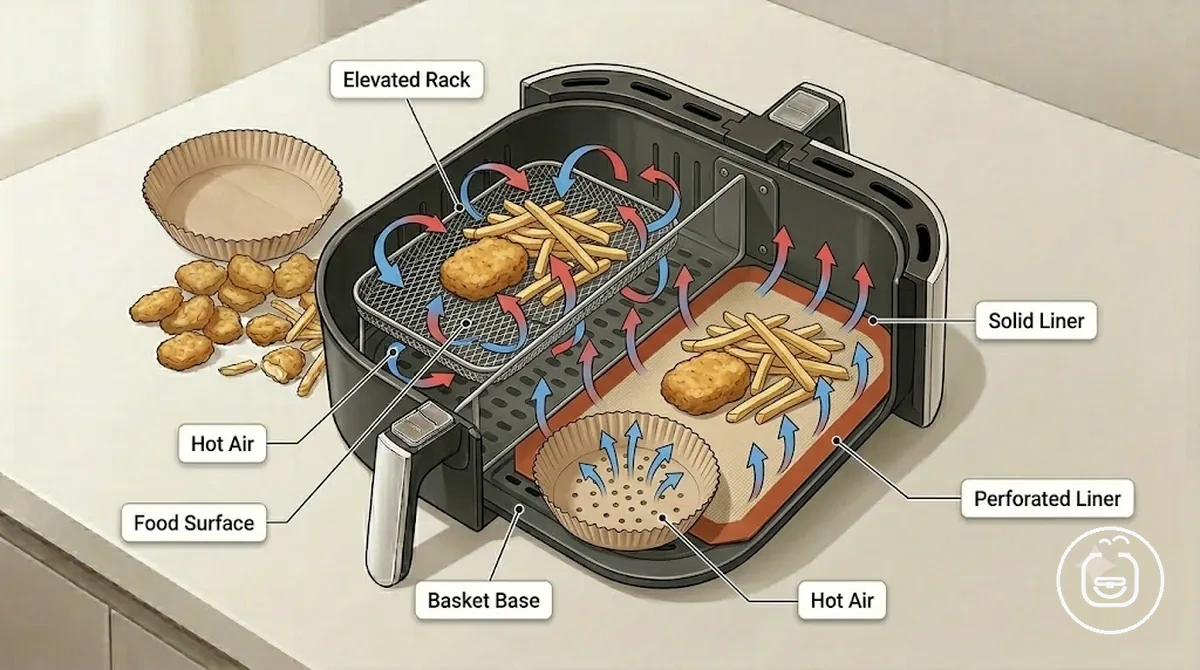
When an accessory adds elevation or leaves open areas around the food, hot air may contact more exposed surfaces. When an accessory creates a larger solid barrier between food and the basket base, airflow contact can become more limited in that area, which may affect browning, moisture release, or cook time depending on the food load and appliance layout.
| Accessory position | Airflow contact | Likely cooking effect | Qualification |
|---|---|---|---|
| Elevated rack | Hot air can reach more sides of the food surface | May support more even browning and crisping | Depends on food spacing, load size, and appliance style |
| Solid liner | Reduces direct contact below covered areas | May retain more moisture and slow crisping in certain areas | Varies by coverage, food type, and airflow path |
| Perforated liner | Allows airflow through openings while covering part of the basket base | May balance containment with airflow access | Results depend on opening pattern and food placement |
An elevated rack and a solid liner show how surfaces can influence airflow differently. The rack creates separation between the food and the basket base, while the liner creates a surface beneath the food that may reduce direct air contact. For a broader explanation of accessory types for use, these differences help explain why crisping, browning, moisture, and cook time may vary between setups.
When to Use an Accessory or Cook Directly in the Basket
The choice depends on whether the cooking task benefits more from containment, lift, or cleanup than from direct basket contact and greater airflow exposure. An accessory can be useful when sticking, mess, or food support is a priority, while direct basket contact supports airflow reaching more of the food surface.
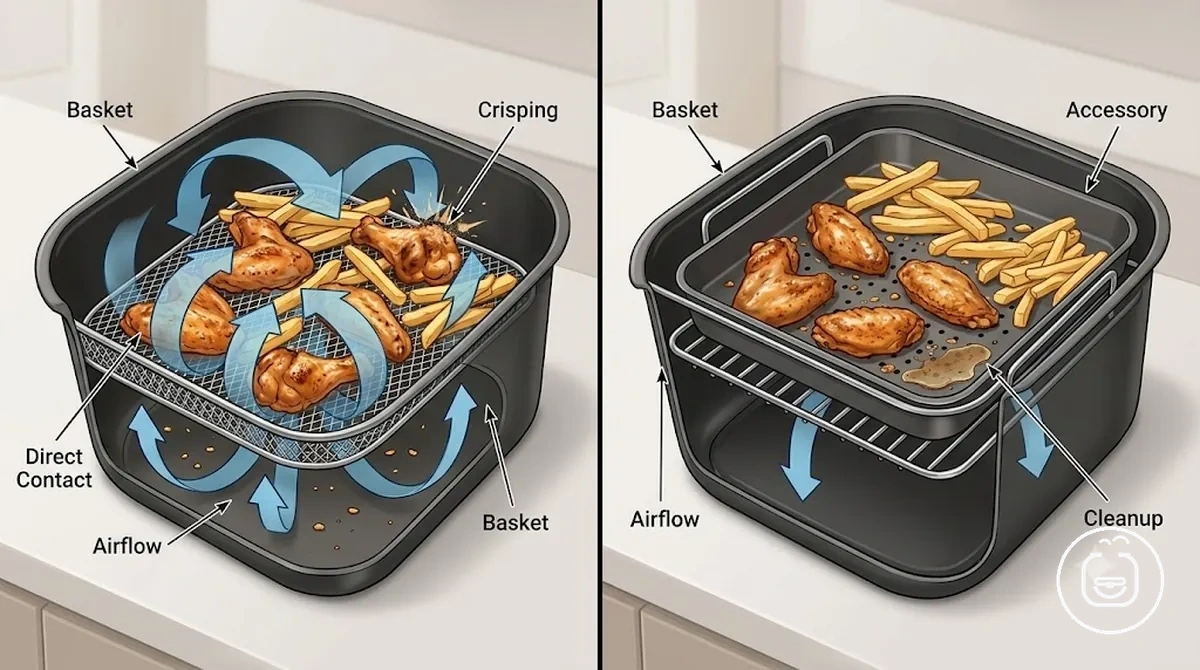
- Messy foods that may release sauces or crumbs: use a liner or tray insert when cleanup matters more than maximum airflow exposure.
- Foods with a higher sticking risk: use an accessory when easier release is a greater concern than direct basket contact.
- Foods that benefit from elevation: use a rack when additional separation may help expose more surfaces to circulating air.
- Foods where crisping is the main priority: consider direct basket contact when bottom airflow exposure matters more than containment.
- Foods that are stable and easy to handle: skip the accessory when cleanup needs are limited and extra support is unnecessary.
Food shape and cooking goals often determine the trade-off. A rack provides lift, a liner helps contain residue, and a tray insert can help manage food placement. Each accessory offers a different balance between convenience and direct airflow exposure within the basket.
Direct basket contact supports airflow exposure, but sticking, cleanup requirements, messy foods, and desired crisping can change the decision. The more suitable option depends on the specific food task and whether containment, elevation, or direct basket exposure is the higher priority.
Pre-Use Checks for Fit, Clearance and Heat-Safe Placement
Accessory use depends on checking fit, clearance, material suitability, and stable positioning before the accessory is placed inside the air fryer. The accessory should sit securely within the basket size, maintain vent exposure, and remain clear of the heating element during normal use.
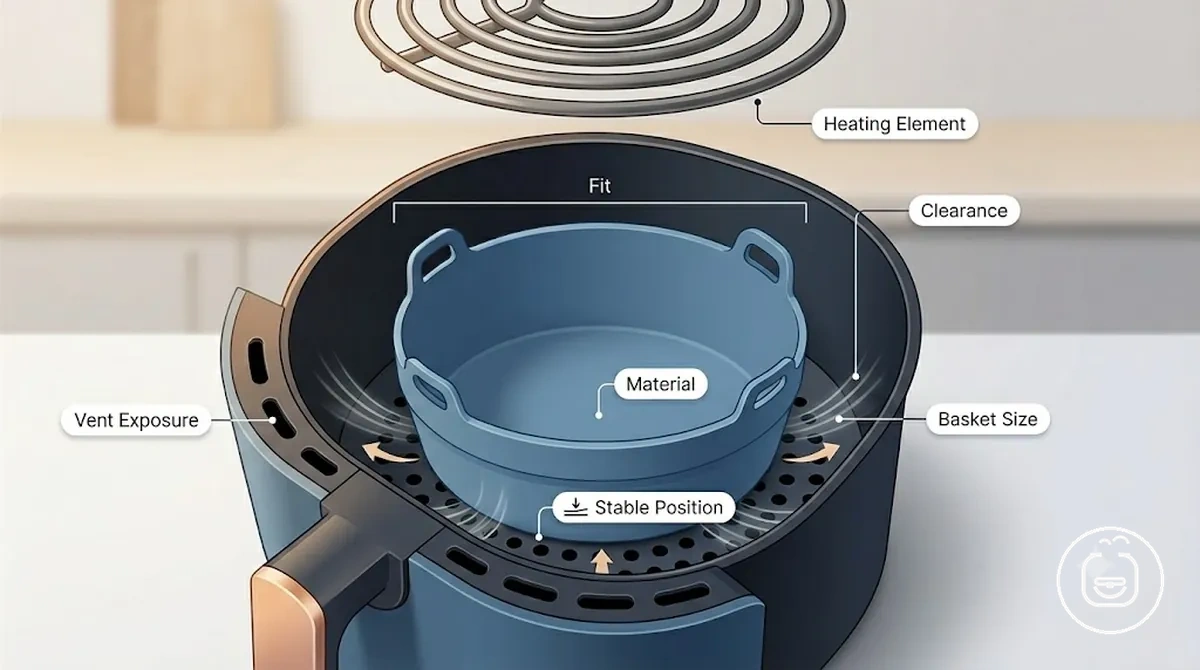
- Fit: confirm the accessory matches the basket size without forcing placement; poor fit may reduce stability or interfere with normal positioning.
- Clearance: maintain space between the accessory and surrounding surfaces; limited clearance may increase the chance of unwanted contact inside the appliance.
- Vent exposure: keep airflow openings uncovered when possible; blocked vent areas may affect air circulation.
- Material: use an accessory only when its material may be suitable for the intended cooking conditions; unsuitable material may limit appropriate use.
- Stable positioning: verify that the accessory rests flat and remains secure; movement during use may change placement or food support.
- Heating element separation: ensure the accessory does not extend into the heating element area; insufficient separation may create a risky use condition.
- Manufacturer limit: review any stated manufacturer limit before use; ignoring those limits may increase uncertainty about suitability.
Accessory checks should begin with fit before use. Basket size, accessory shape, and available clearance influence whether the accessory can sit correctly without crowding the cooking area or reducing stable positioning.
Material evaluation supports heat-safe placement, but detailed material assessment belongs to safe materials before use. For this use page, the practical goal is confirming that the accessory material may be appropriate for the intended cooking conditions and does not create obvious placement concerns.
A final verification can help confirm that the accessory remains stable, maintains vent exposure, stays clear of the heating element, and follows any stated manufacturer limit before cooking begins.
Placing Liners, Mats and Inserts on the Basket Base
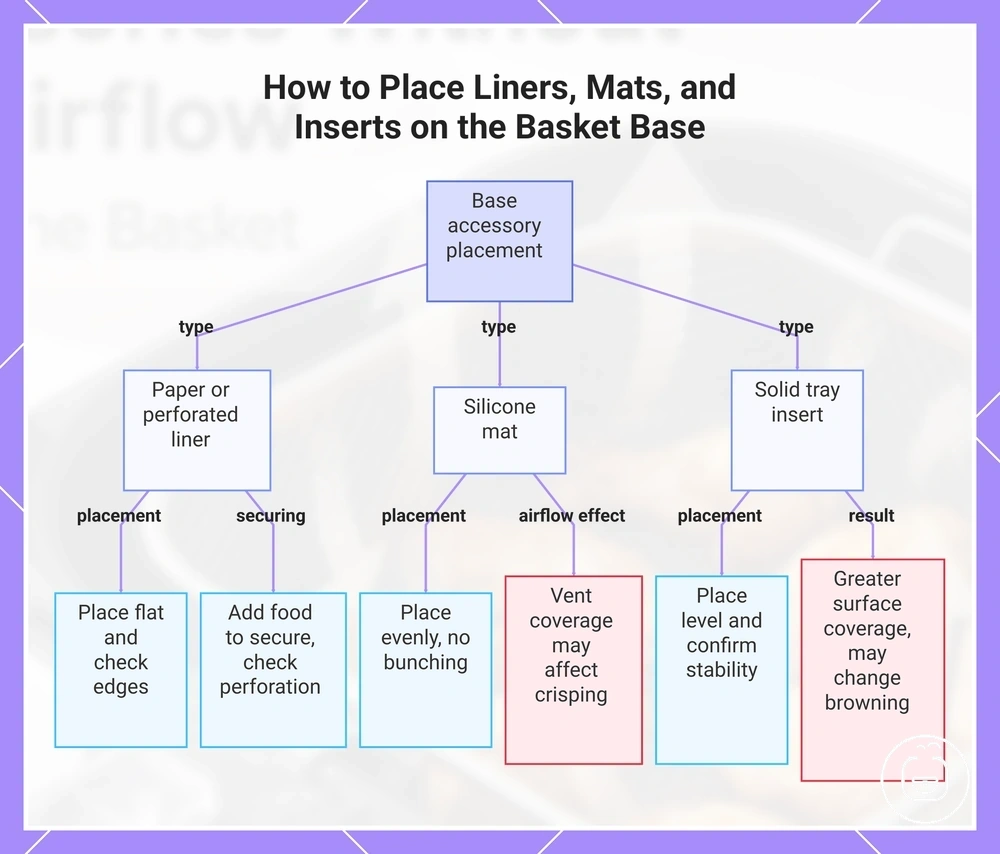
Placing a liner, silicone mat, or tray insert starts with keeping the base accessory flat on the basket base, maintaining vent awareness, and ensuring food weight can help keep the accessory stable during cooking. Bottom airflow depends on how the accessory sits, how much vent coverage it creates, and how much food contact occurs across the surface.
- Place the liner flat on the basket base and check that the edges rest inside the cooking area without folding or lifting. Flat placement helps reduce movement, while raised edges may shift position during cooking.
- For a paper liner or perforated liner, add food before cooking when fan movement could affect a lightweight accessory. Check that the food weight keeps the liner in place and that perforation remains exposed where possible. An unsecured liner may move, while perforation can help maintain airflow paths depending on food coverage.
- Position a silicone mat so it lies evenly across the basket base without bunching or overlapping. Check that the mat does not create unnecessary vent coverage. Excess surface contact may influence bottom airflow and may affect crisping outcomes depending on the food and cooking setup.
- Place a solid tray insert level on the basket base and confirm that it remains stable during food loading. Compared with a perforated liner, a solid insert creates more surface coverage beneath the food, which may change airflow contact and browning patterns in some situations. For deeper guidance on using liners correctly, liner-specific differences can be reviewed separately.
- Complete a final vent-aware check before cooking. Confirm that the accessory remains flat, food weight is distributed evenly, and vent coverage stays within the intended placement area. This final check helps reduce movement and supports more consistent airflow around the food.
This chart shows the placement checks and airflow considerations for each type of basket base accessory.
Keep Liners Flat and Weighted Before Heating
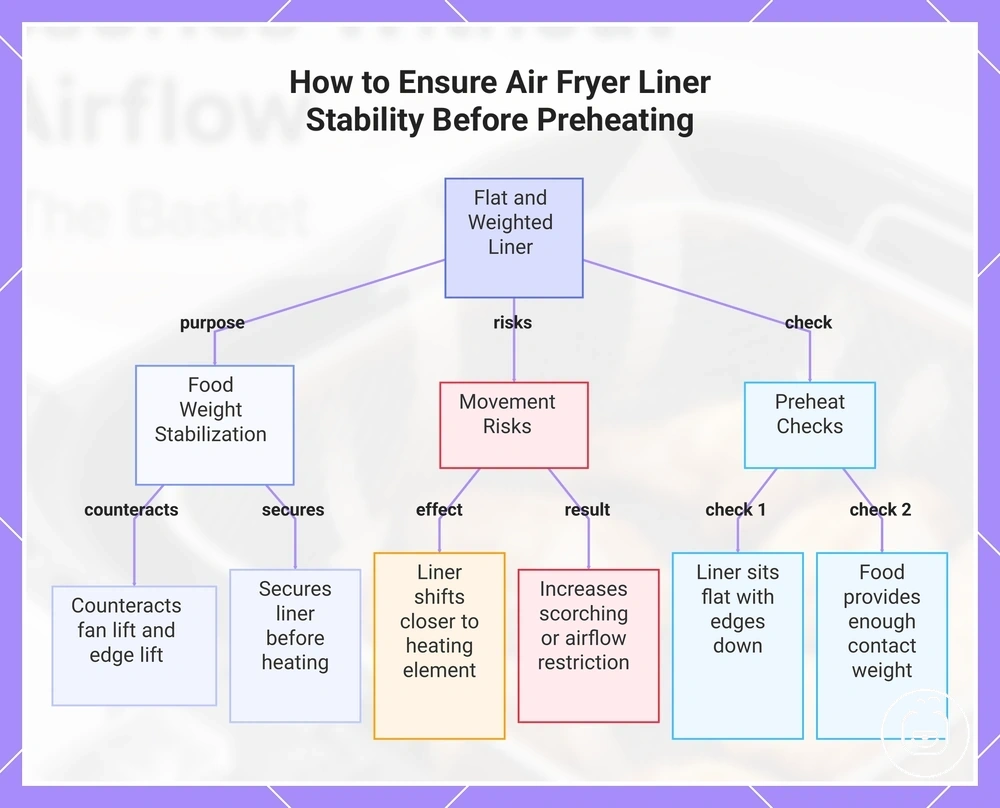
A liner should stay flat and held in place by food weight before heating begins. Food weight helps stabilize a liner, while fan lift and edge lift may increase the chance of movement when the liner is not secured by food contact.
Movement risk can be higher during preheating without food or when very light foods provide limited food weight. If fan lift or edge lift causes the liner to move closer to the heating element, the liner may shift position, increase the chance of scorching, or create airflow restriction in part of the basket. Before heating, check that the liner sits flat, the edges remain down, and the food provides enough contact to help keep the liner stable.
This chart shows the role of food weight in stabilizing liners, the risks of liner movement, and the essential checks before heating.
Use Perforated Liners When Bottom Airflow Matters
A perforated liner can be useful when bottom airflow matters because the holes can leave more bottom-air paths than solid coverage. Whether that supports crisping depends on the hole pattern, food coverage, and the cooking goal.
Use a perforated liner when the goal requires a balance between grease control, cleanup, and airflow access. The holes should remain open where possible, since covered holes may reduce airflow support beneath the food.
- When crisping is the priority, a perforated liner can leave more airflow paths through the basket base, but heavy food coverage may reduce that effect.
- When cleanup is the priority, greater surface coverage may improve grease control, but more coverage can contribute to slower browning in some areas.
- When foods release grease or moisture, a perforated liner can help manage cleanup while still leaving openings for bottom airflow; the result depends on how much of the hole pattern remains exposed.
- When food fully covers most holes, airflow support may become more limited, even with a perforated liner.
The contrast is usually between cleanup-first use and crisping-first use rather than between good and bad liner choices. A perforated liner can support bottom airflow more than solid coverage, while the cooking outcome still depends on food coverage, basket design, and surface contact.
Account for Silicone Mats and Solid Inserts Slowing Crisping
A silicone mat or solid insert may slow crisping because it can reduce direct bottom airflow and increase the food contact area beneath the food. The effect depends on factors such as thickness, perforation, raised texture, food moisture, and how much of the basket base remains exposed.
A silicone mat or solid insert can also support cleanup and food handling by creating a barrier between the food and the basket surface. For example, a wet or sauced food may benefit from easier cleanup, while a crisping-first food may respond differently when greater food contact and reduced bottom airflow limit moisture release from the underside. Slower crisping can be an acceptable trade-off when containment, easier handling, or cleanup matters more than maximum bottom-surface browning.
Placing Racks, Skewers and Tray Inserts Above the Base
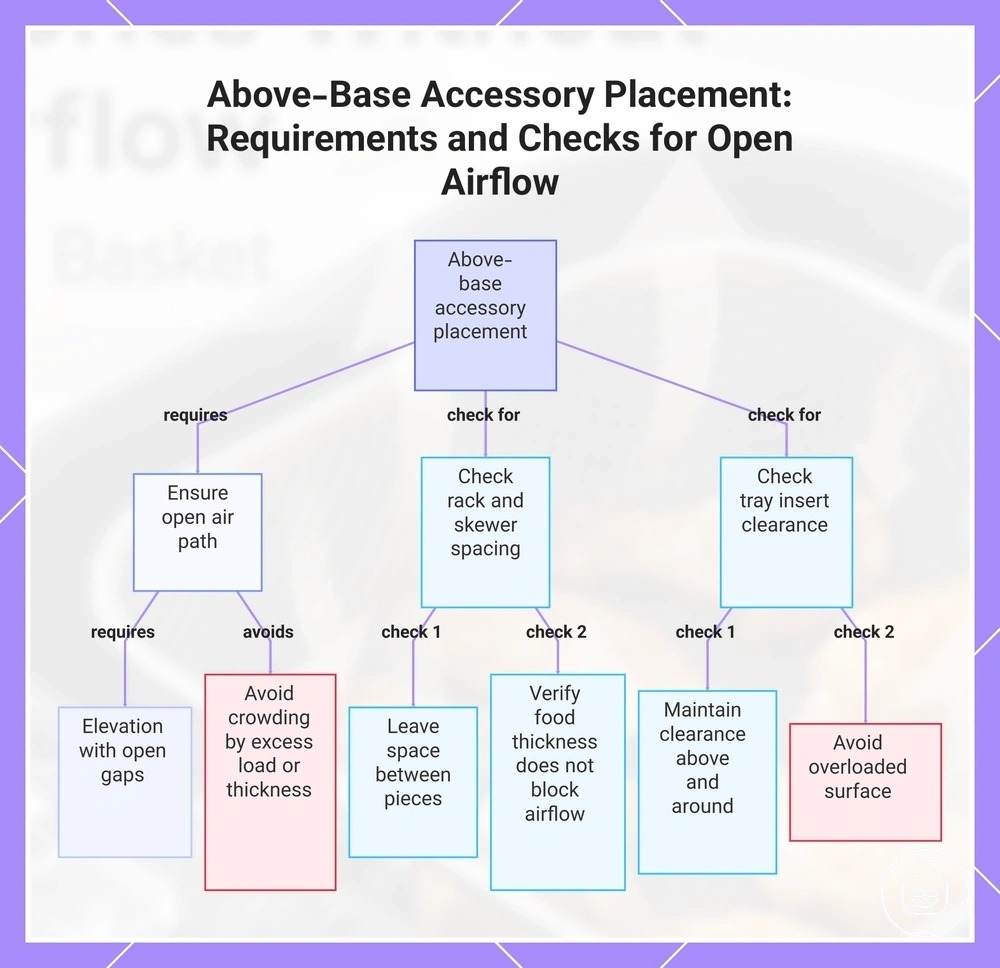
Placing a rack, skewer rack, or tray insert above the base starts with creating elevation while keeping open gaps around the food. An above-base accessory works best when the air path remains open around the rack, skewer rack, tray insert, and food rather than being crowded by excess load or food thickness.
- Position the rack, skewer rack, or tray insert so the accessory sits level and maintains clearance from surrounding surfaces. Check that elevation creates open gaps around the food, since limited clearance may restrict the air path.
- Arrange food with visible separation between pieces rather than concentrating the load in one area. Verify that food thickness does not block airflow between adjacent pieces, as dense placement may reduce browning balance.
- For a cooking rack, use elevation to expose more food surfaces while keeping the load balanced across the rack. Uneven load distribution may affect stability and can create areas with less airflow access.
- For a skewer rack, leave space between skewers and check that food thickness does not close the gaps around the food. Narrow spacing may limit the air path and can reduce the benefit of elevation.
- For a tray insert, maintain clearance above and around the insert while avoiding an overloaded surface. When the air path remains open, airflow may reach more food surfaces; when crowding develops, cooking results may become less even.
This chart shows the key requirements and specific checks for placing racks, skewer racks, and tray inserts above the base to maintain an open air path and avoid crowding.
Elevate Food Without Crowding the Heating Path
Elevating food with a rack or skewer helps only when spacing leaves open gaps around the food. Crowding can reduce airflow exposure, so food height, clearance from the heating zone, and visible gaps between pieces matter more than simply raising the food above the base.
A single spaced layer on a rack may allow better airflow exposure around more surfaces, while an overloaded rack can close open gaps and may contribute to uneven cooking or steaming depending on food moisture and load. The goal is to elevate food while preserving clearance and separation around each piece.
- Check food height to confirm elevated food remains clear of the heating zone.
- Check spacing between pieces and maintain open gaps on the rack or skewer.
- Check clearance around the food so nearby pieces do not block airflow exposure.
- Check batch size and reduce the load when gaps begin to disappear.
Adjust Rack Position for Basket and Oven-Style Air Fryers
Rack position depends on appliance layout because a basket air fryer and an oven-style air fryer can move heat around elevated accessories in different ways. Clearance, heating direction, tray level, and food placement can influence airflow exposure and cooking balance.
Rack position should be adjusted according to the appliance style rather than assuming the same placement works in every layout.
| Basket-style placement | Oven-style placement |
|---|---|
| Use a rack position that leaves clearance above the food and allows air to move beneath elevated pieces. Food height and available basket space may affect whether turning is needed during cooking. | Choose a tray level that maintains clearance around the food and accessory. Heating direction and shelf position may influence airflow exposure and may affect turning needs or browning balance. |
Placement principles matter when adjusting rack position, but exact size and fit before use should be verified separately. Rack height, tray level, clearance, and turning needs can vary by appliance layout and accessory configuration.
Mistakes That Restrict Airflow During Accessory Use
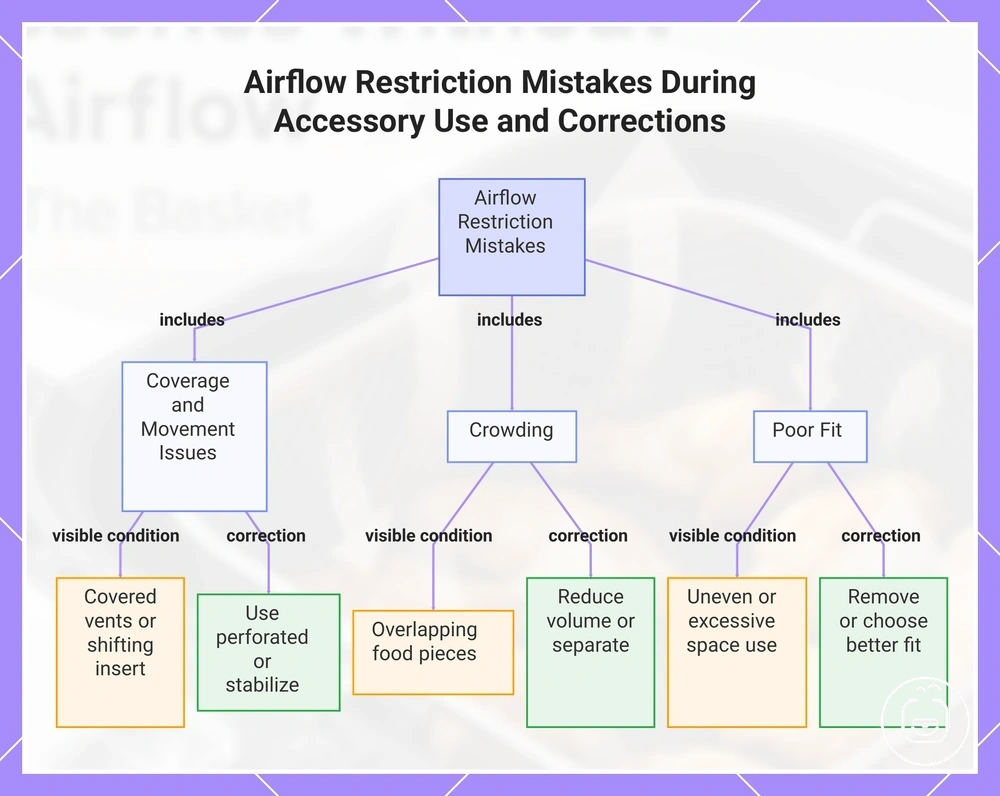
Airflow restriction usually comes from coverage, movement, crowding, or poor fit rather than from the accessory name alone. Covered vents, unstable accessories, overcrowded food, and limited clearance can reduce open air paths and may affect cooking balance.
Most airflow problems can be identified through visible conditions before focusing on cooking results. When coverage increases or movement changes accessory position, airflow exposure may become less consistent depending on food load and appliance design.
- Mistake: Excessive coverage. Visible condition: Vent areas or basket openings are covered. Airflow effect: Airflow restriction reduces open air paths. Correction: Consider a perforated option when more airflow access is needed.
- Mistake: Accessory movement. Visible condition: A liner, mat, or insert shifts during use. Airflow effect: Air paths may become partially blocked. Correction: Reposition or remove accessory use when stable placement cannot be maintained.
- Mistake: Crowding. Visible condition: Food pieces overlap or leave few open gaps. Airflow effect: Overcrowding reduces airflow exposure and may contribute to uneven browning or steaming. Correction: Reduce food volume or separate food into smaller batches.
- Mistake: Poor fit. Visible condition: The accessory sits unevenly or occupies excessive space. Airflow effect: Clearance and airflow paths may become limited. Correction: Remove accessory use or choose an option that leaves more open space.
These conditions are practical decision signals rather than guaranteed causes of cooking issues. If airflow restriction remains visible after adjustments, reducing food volume, switching to a perforated option, or cooking directly in the basket may help create a more open airflow path depending on the appliance design and food load.
This chart shows the four common mistakes that restrict airflow during accessory use, along with their visible conditions and recommended corrections.
Loose Paper, Lightweight Food and Covered Vents
When loose paper, lightweight food, or covered vents are present, airflow problems often come from movement or blocked air paths. Loose paper can move because of fan lift, and covered vents can restrict airflow, which may contribute to uneven cooking depending on placement and appliance design.
- Caution: Loose paper can shift during cooking. Why it matters: Fan lift may move the paper closer to the heating element. Correction: Keep the paper secured by normal food weight.
- Caution: Lightweight food may not hold a liner in place. Why it matters: Movement can change the liner position during cooking. Correction: Use enough food contact to help keep the liner stable.
- Caution: Covered vents reduce open airflow paths. Why it matters: Blocked intake or exhaust areas can restrict airflow and may contribute to uneven cooking. Correction: Keep vent areas as unobstructed as practical.
- Caution: Paper that moves toward the heating element receives greater heat exposure. Why it matters: Scorching may occur depending on placement and airflow conditions. Correction: Reposition the paper so it remains stable within the cooking area.
A simple corrective example is placing food on a liner so the liner remains flat and less likely to move during normal accessory use. This approach helps reduce movement without covering vents or allowing loose paper to enter active airflow paths.
Overcrowded Racks, Trays and Basket Inserts
When airflow becomes limited around an accessory, an overcrowded rack, tray, or basket insert is often the cause. Food overlap and blocked gaps reduce open air paths, turning overcrowded racks, trays, and basket inserts into airflow barriers instead of airflow-supporting surfaces.
Load height and excess food volume change how air moves around the accessory. As overlap increases and blocked gaps become more common, steaming or uneven browning may occur depending on food moisture and layout. A rack with visible spacing preserves accessory function more effectively than an overloaded setup where food covers most open gaps.
- Reduce food volume when overlap closes the open spaces between pieces.
- Rearrange food to restore blocked gaps around the rack, tray, or basket insert.
- Separate batches when load height creates crowded layers.
- Split dense food groupings so airflow can move through more open areas.
Safe Handling While Accessories Are Hot
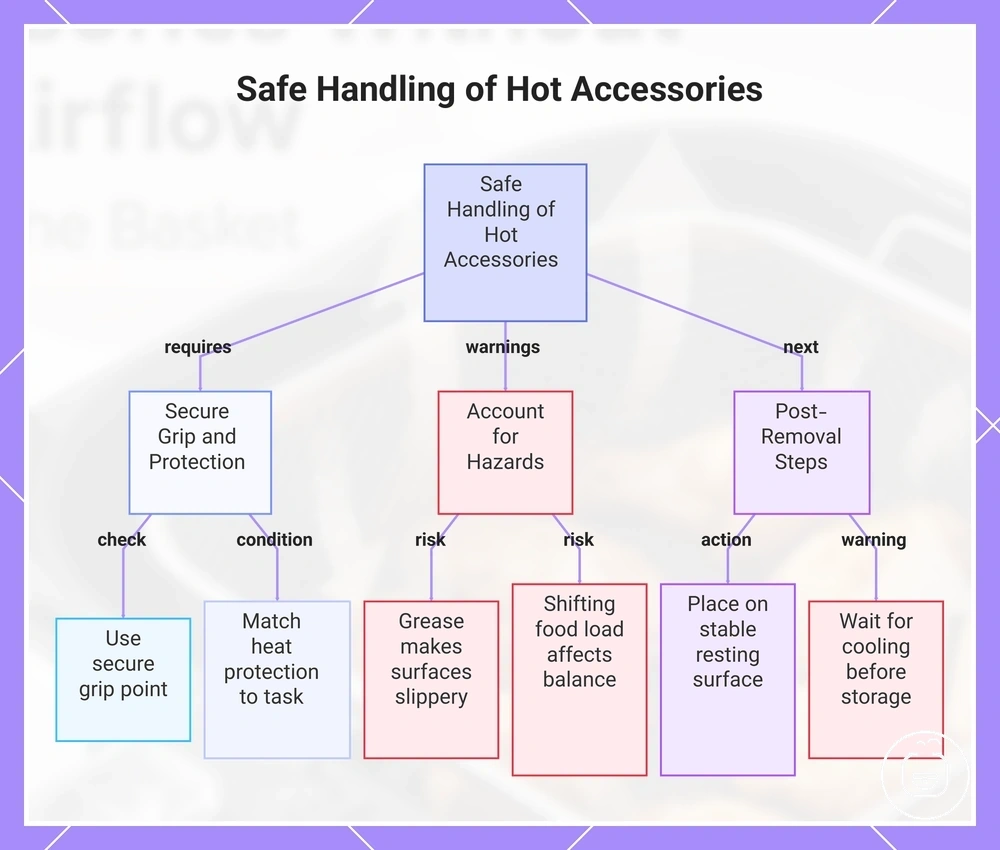
Hot accessories should be removed and moved with attention to grip point, food load, grease, and surface stability because hot racks, trays, liners, and inserts can shift, drip, or transfer heat differently after cooking. A stable grip and appropriate heat protection help reduce the chance of dropping removable parts or disturbing hot food.
- Use a secure grip point before lifting a hot accessory.
- Account for grease that may make surfaces or removable parts more slippery.
- Place hot accessories on a stable resting surface that can tolerate transferred heat.
- Move food-loaded accessories carefully because shifting weight may affect balance.
Tongs can help with certain hot accessories when the grip point remains stable and accessible, but handling needs vary by accessory shape, material, and food load. Heat protection should match the handling task rather than assuming one tool is suitable for every accessory.
After removal, allow hot accessories to rest on an appropriate resting surface before moving them again. Material, food residue, and grease can influence cooling time, so the wait before storage or further handling may vary.
Cooling time also matters before storing removable parts or beginning cleaning after use. Once the accessory has cooled enough for handling, residue and grease can be addressed before storage.
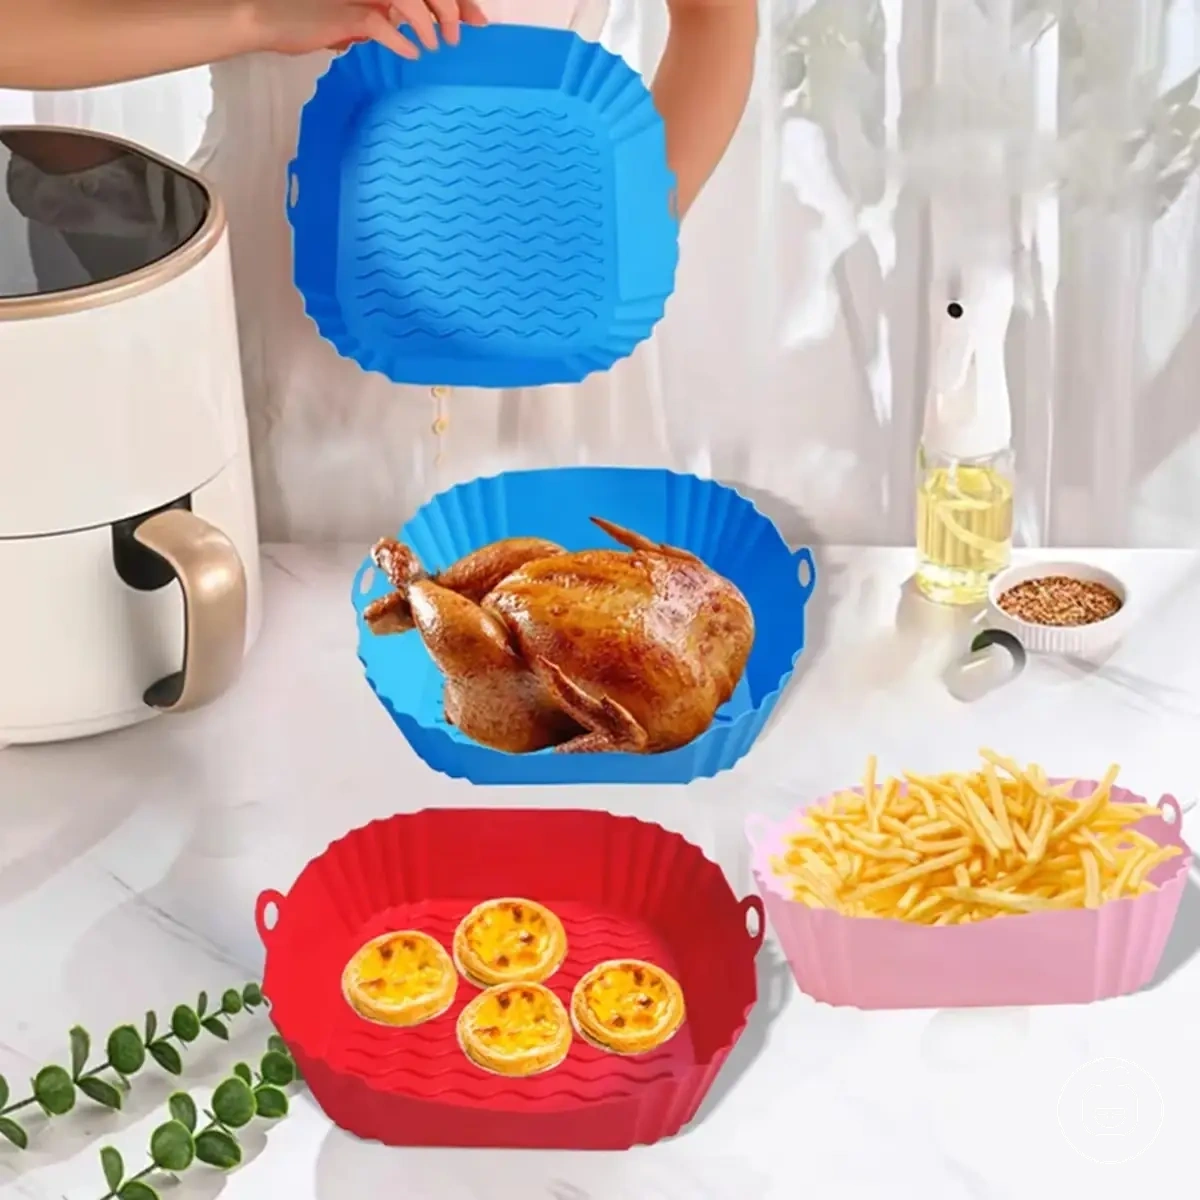
The products below are useful examples for comparing available options. Before buying, check that the compatibility criteria, key features, and product details match your needs.
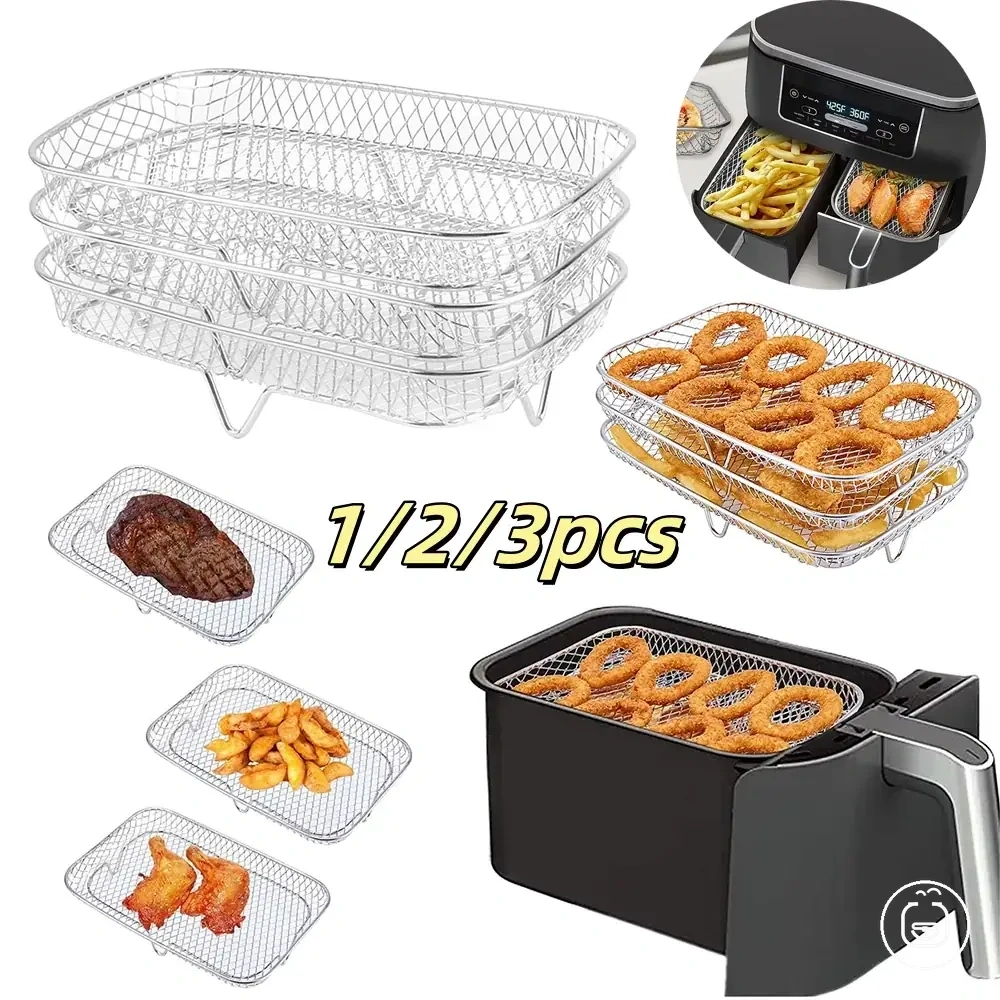
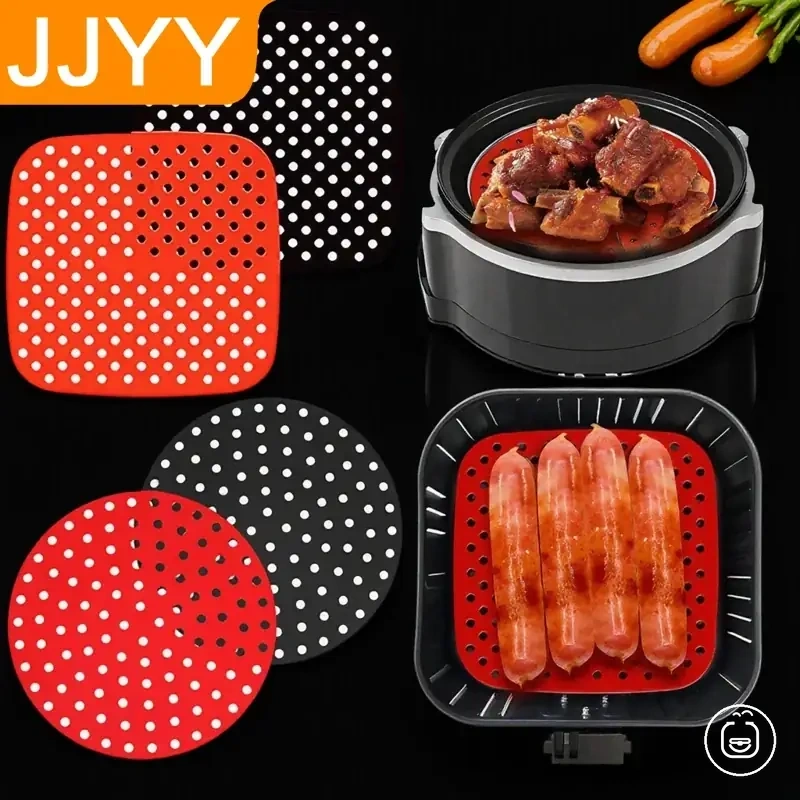
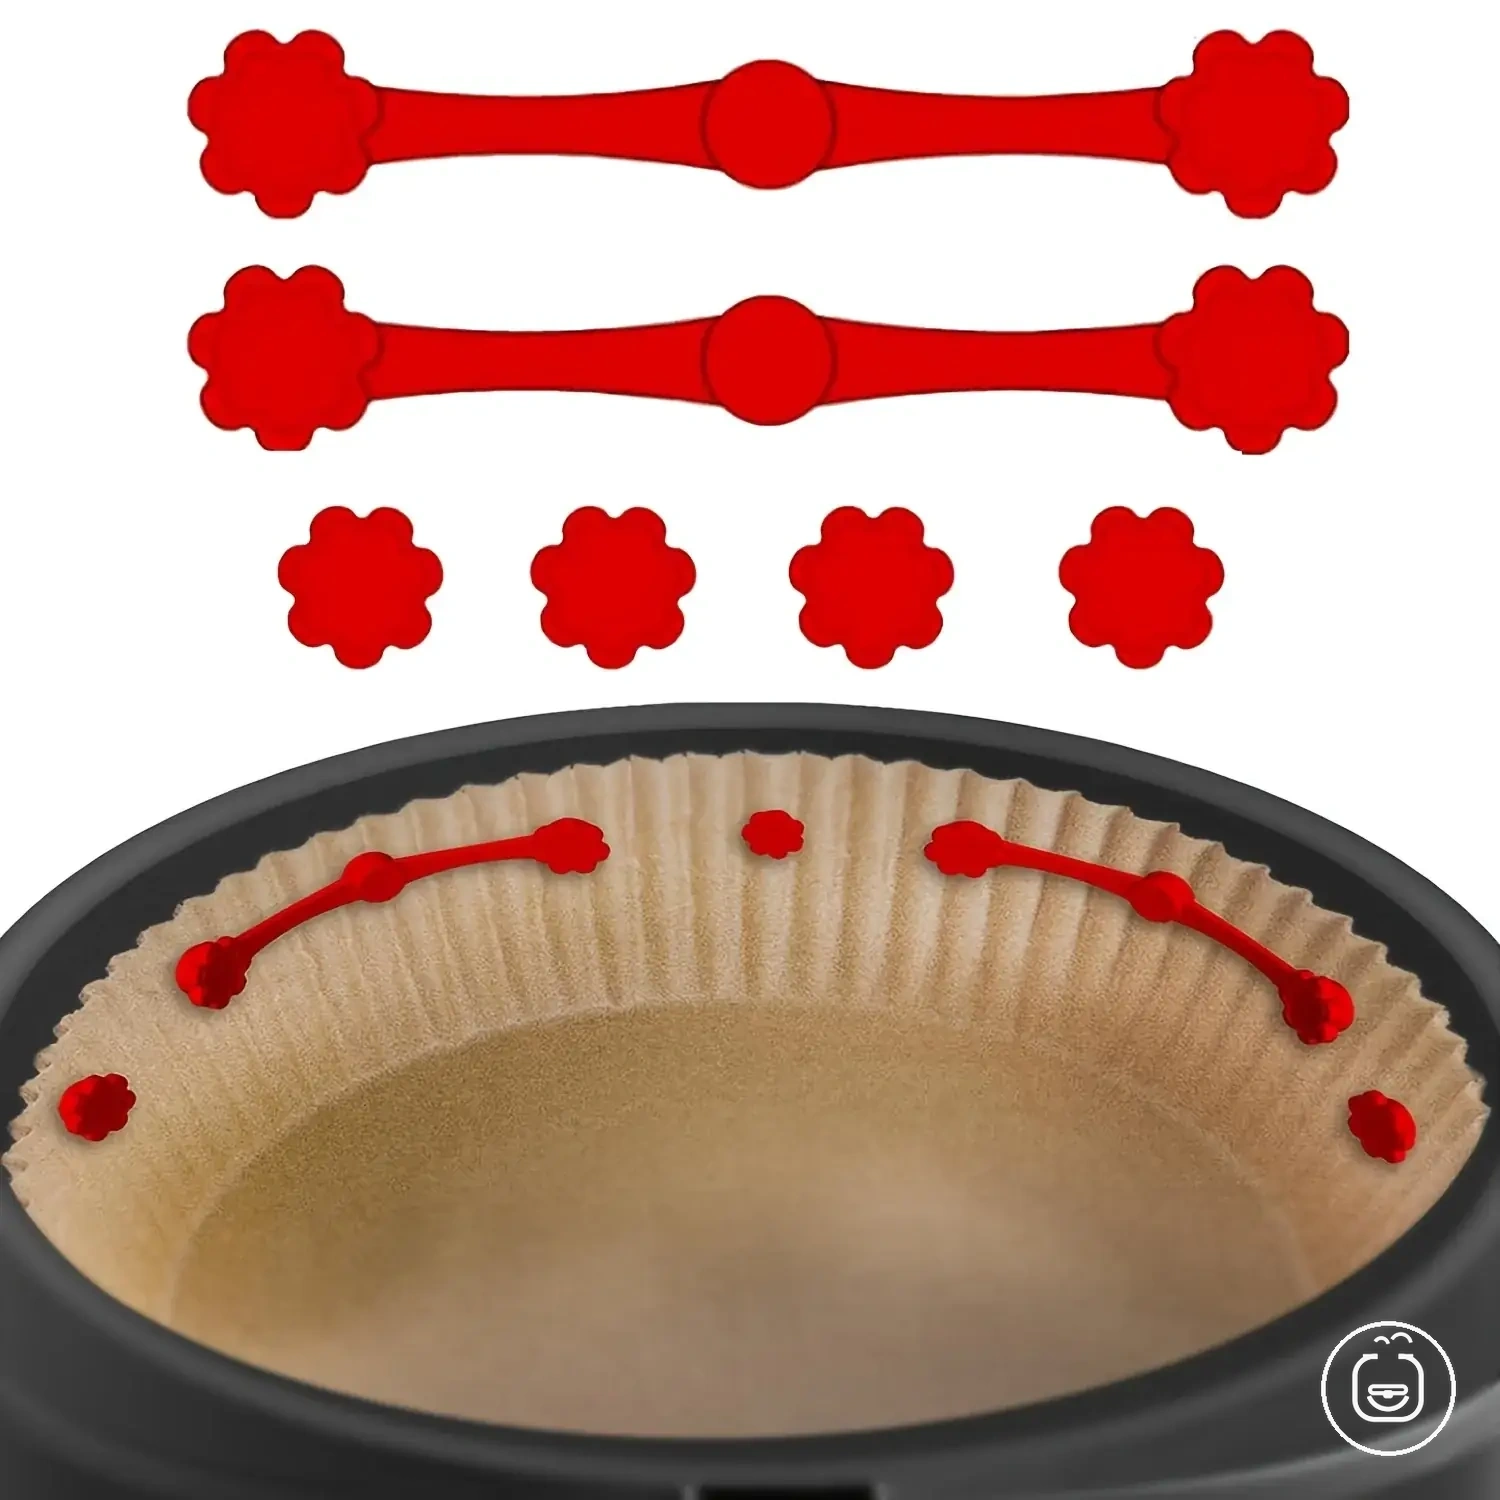
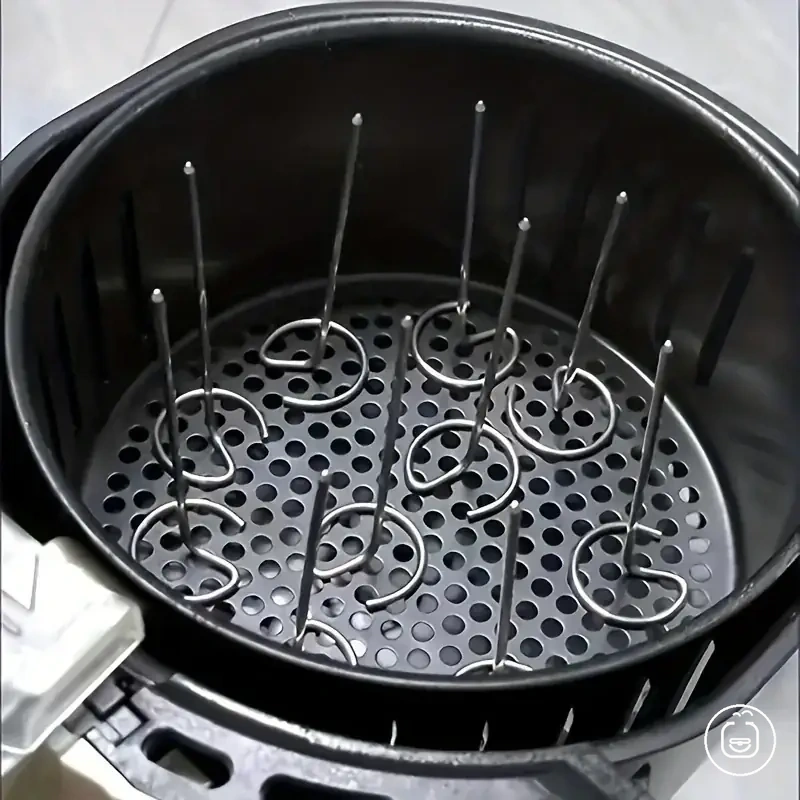
This chart shows the key requirements, hazards, and post-removal steps for safely handling hot oven accessories.
Use Tongs and Heat Protection for Removable Parts
Tongs, mitts, and heat-safe grips can improve control when removable parts are hot, but the grip method should match the accessory shape, grip point, and food weight. A stable grip matters because heat retention, grease, and uneven load can increase slipping risk during lifting.
Flexible silicone pieces, small skewer racks, and a loaded tray may bend, tilt, or shift when lifted if the grip point is weak or the food weight is uneven. Use heat protection for hand contact, and use tongs only when they can hold the removable part securely without crushing, dragging, or tipping the load.
- DO: Check grip stability before lifting a removable part fully from the basket or cavity.
- DO: Support a loaded tray or flexible silicone piece from a stable point when food weight may shift.
- DON'T: Assume tongs fit every removable part or every grip point.
- DON'T: Lift a small skewer rack or food-loaded accessory from one unstable edge if the load may tilt.